How to Save a Chipped Glass

Don’t toss a glass with a chip in it, a chipped glass can be saved.
Repairing Chipped Glass
How to save a chipped glass? How many times have you thrown out a glass that has a chip along the rim of the glass? I’ve tossed a few but I have some stemware I want to keep and have a complete set for use on special occasions and holidays. Granted, these are not expensive but I like them and they’re perfect for us.
Typically the chip is on the rim of the glass; if it’s stemware, you may find it at the base of the glass. If the chipped glass is small, instead of tossing it or keeping it buried in the back of a cupboard, why not take a chance and try to fix it yourself? If you’re careful, you’ve got yourself a full set of glasses again.
I will say if the chip is large and it happened to an heirloom piece or a special piece of crystal stemware, you may want to see if there is a restoration company in your area.
Small Chips in Glassware Can Be Fixed
Great, you’ve opted to give this a go and fix the chip. Below are a few simple steps for you to follow. Work in the area of the chip as best as you can.
Supplies Needed to Save a Chipped Glass:
- 1 piece of coarse grit sandpaper.
- 1 piece of super fine sandpaper.
I happen to have fun refinishing furniture so I had sandpaper on hand. If you don’t have the sandpaper, and you do your own nails, you may have a coarse emery board and super fine nail block on hand that may work just as well.
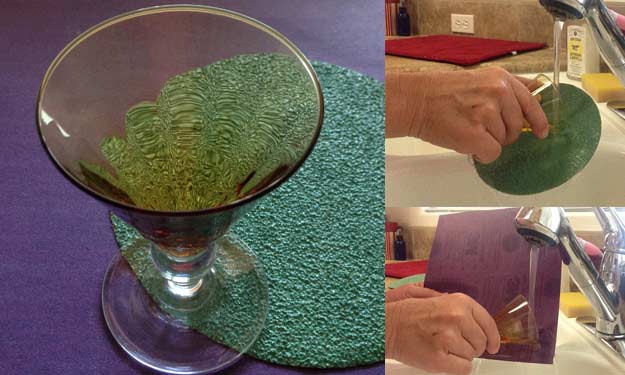
Be sure as you go along you are sanding the area of the chipped glass under running water and don’t rub too hard or you run the risk of breaking the glass.
Step 1 – Coarse Grit Sandpaper
Start sanding with the coarse grit piece of sandpaper and gently rub the area of the glass where the chip is. Periodically stop and rub your finger over the area. It shouldn’t be long before you feel the chip has been sanded out.
Step 2 – Wash the Glass and Check the Chipped Area
Wash the glass and let it dry. I do this because I can clearly see the dull surface area where I was sanding the chip.
Step 3 – Super Fine Sandpaper
Now take the super fine piece of sandpaper and again, under running water, gently rub where the chip was, where the dull surface area is from using the coarse grit sandpaper. Again, this shouldn’t take long.
Step 4 – Wash the Glass and Check for Remaining Dullness
Wash the glass again and when it’s dry, check to see if any area needs to be sanded again with the fine grit sandpaper to remove any remaining dullness.
Step 5 – Jewelry Polishing Cream
Now at this point, my glass looked really good. There were no signs of where I had sanded but it did feel just a little less smooth. So I rubbed some of my jewelry polishing cream gently over the surface and it did seem to help.
When you’ve finished wash the glass by hand and let it dry to see your handy work, and that is how to save a chipped glass.

